Posted by Darren Castine on Mar 14th 2021
Jeep XJ Unibody / Chassis Stiffeners Installation Guide
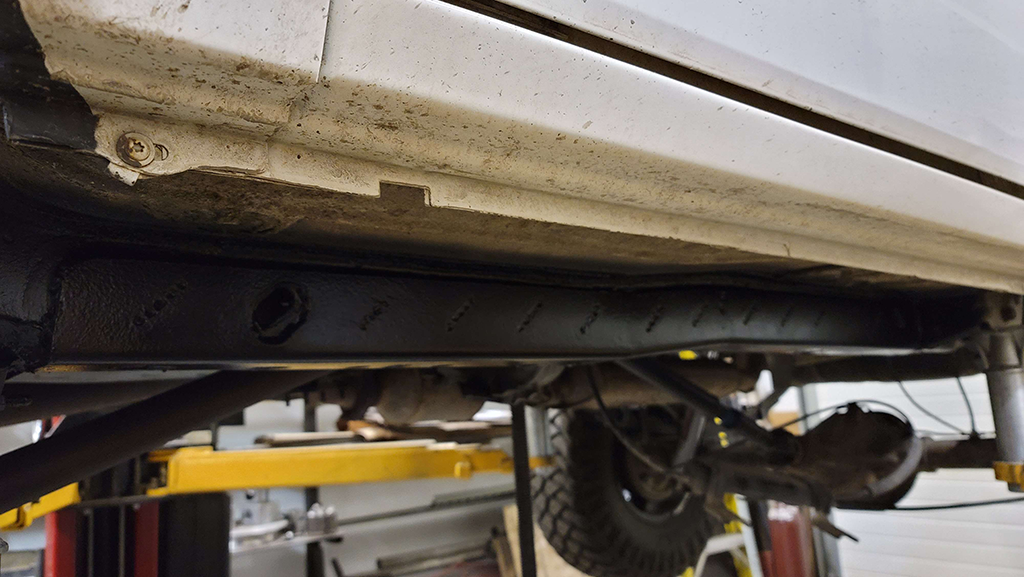
XJ Cherokee Unibody Stiffeners Installation
Follow along below as we show you how to install a set of our Jeep XJ Unibody (Chassis) Stiffeners...
Step 1:
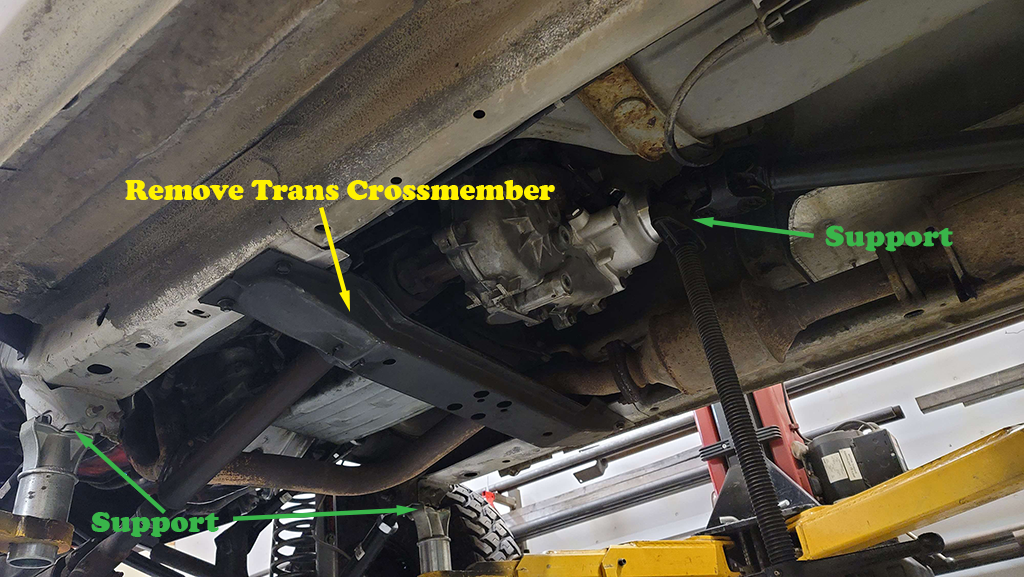
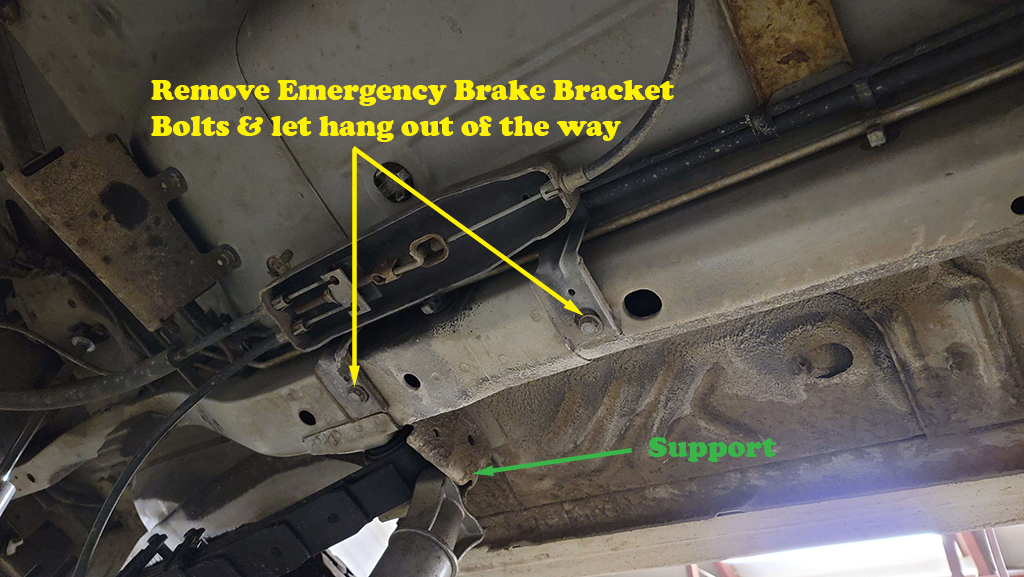
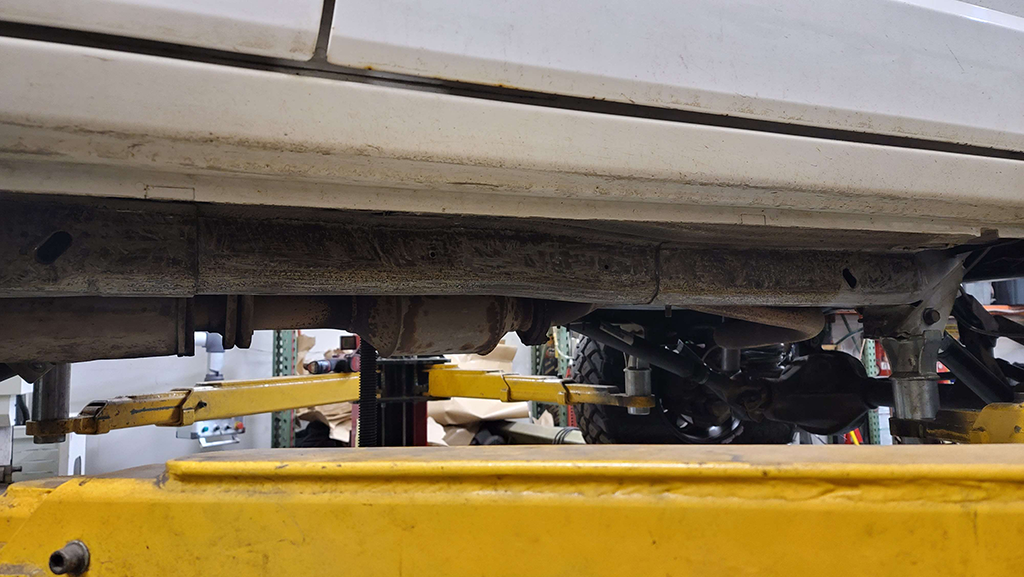
In order to install your stiffeners, you must create access to the full area that they will cover. This means a couple things - a.) you will need to support the transmission/transfer case so that you can remove the transmission crossmember, and b.) if you are doing the install on a lift, the lift arms must be positioned so they are not in the way of the unibody frame rails. We use the front lower control arm mounts, and the rear leaf spring boxes as lifting points, and a support under the rear driveshaft output. The emergency brake bracket must also be unbolted and let hang out of the way.
Step 2:
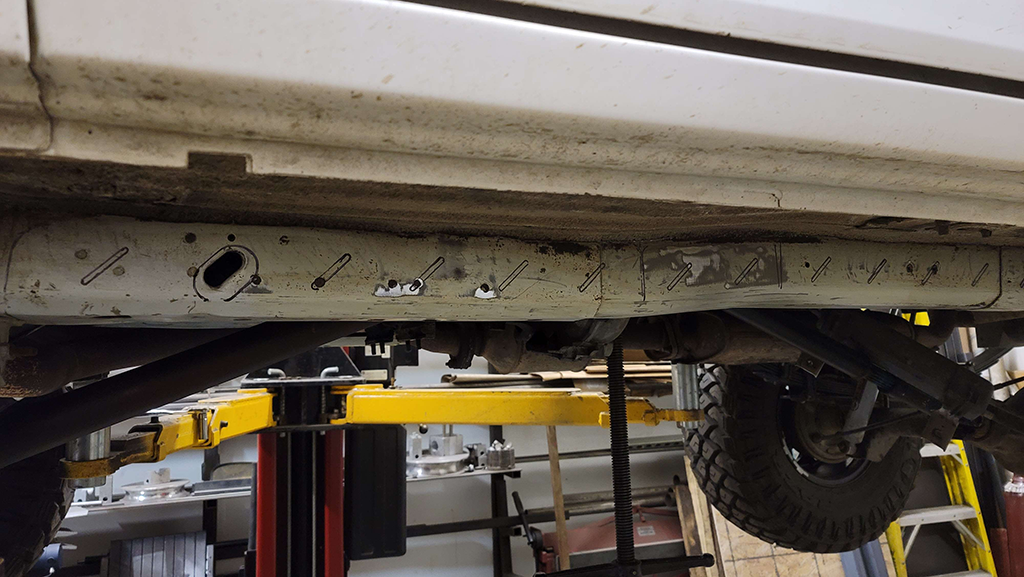
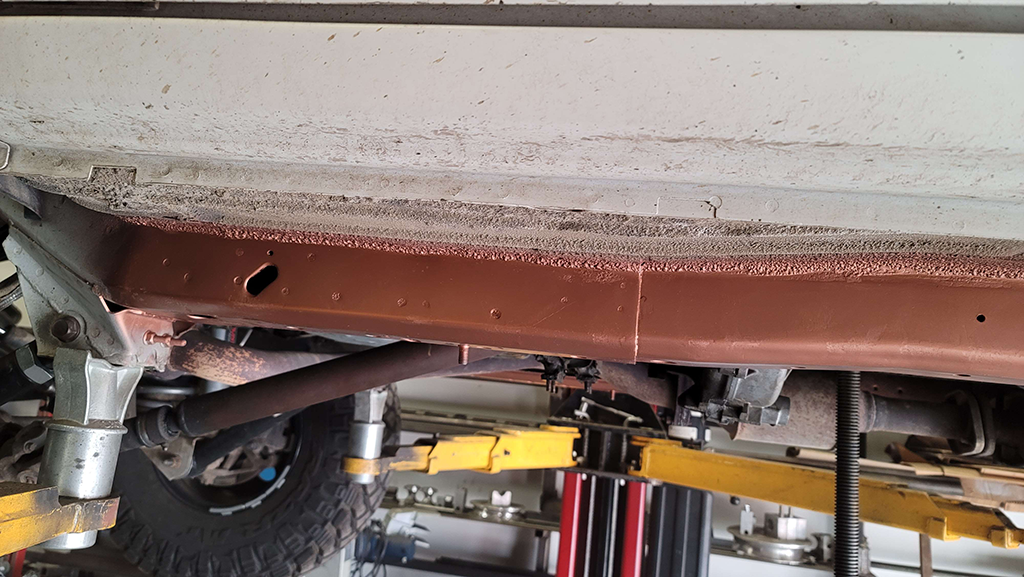
This step is typically the least favorite around here. Get yourself a nice gasket scraper as shown and make sure it's sharpened well and straight. Some XJs have a bunch of textured undercoating around the unibody framerails, others have very little but they all typically have at least some. The goal here is to make the existing unibody smooth by removing as much of the undercoating as possible, while still attempting to keep as much of the good factory paint as possible. We are going to be removing certain areas of the paint later on, so if it gets scratched up a little it's not a big deal - we just want to keep as much rust protection that's already there as possible.
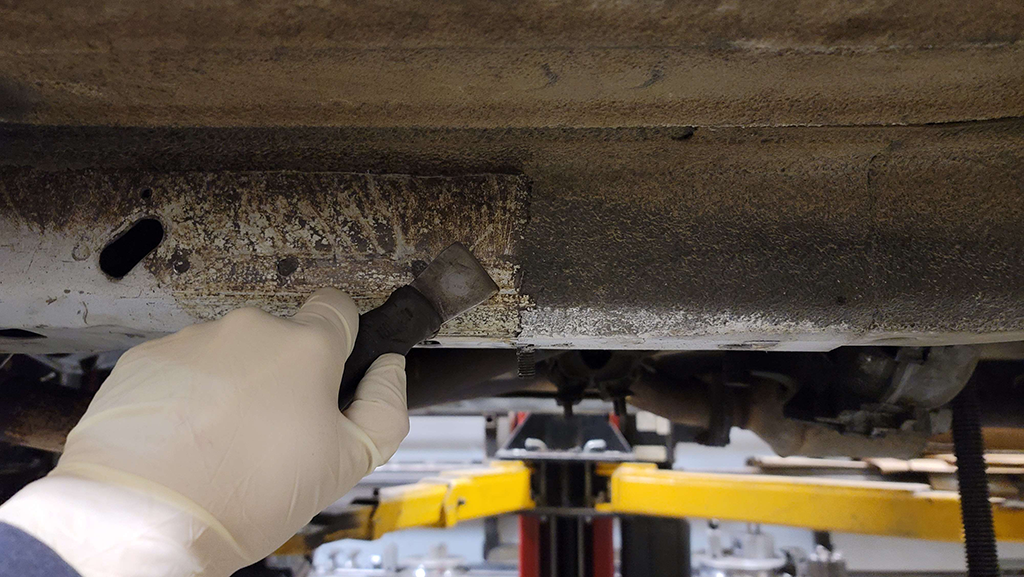
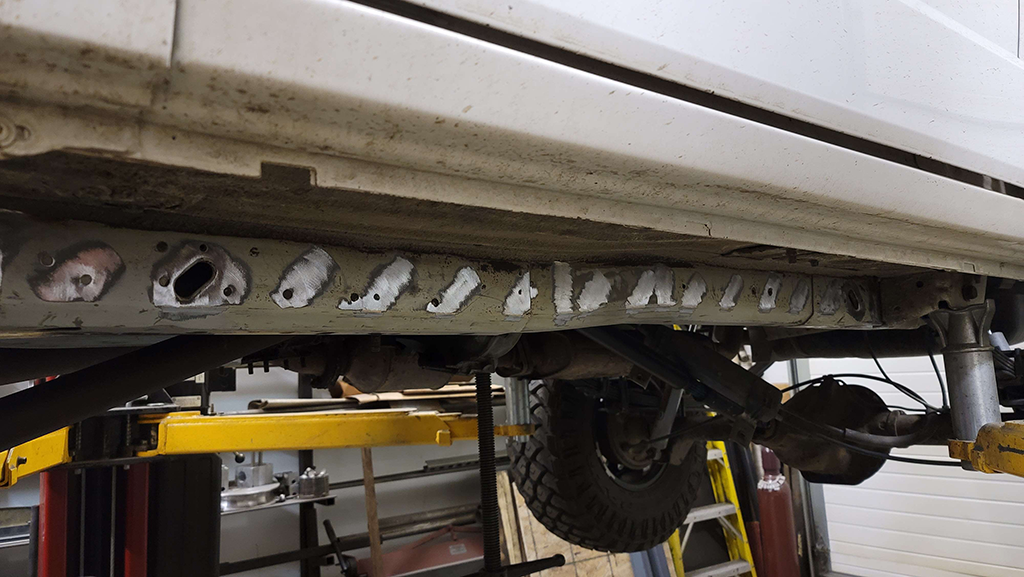
Once you have all the undercoating scraped off, you should be left with something that looks a bit like this...
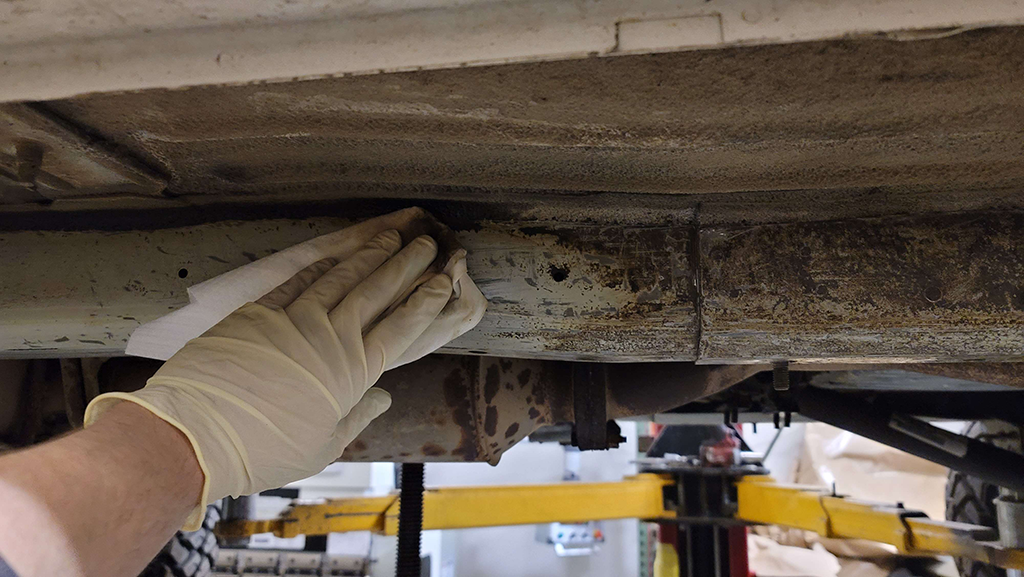
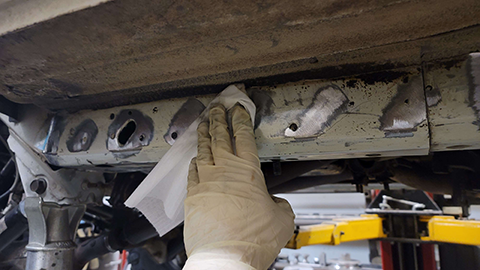
Now that you have the scraping done, grab some autobody degreaser and a rag, and generously clean all the area that the stiffeners will be going. A good amount of the remaining undercoat will actually come off in this process. The reason for doing this is that next you will be using a sharpie to mark in this area and then a sanding disc and the gooey part of the undercoating will clog those things up.
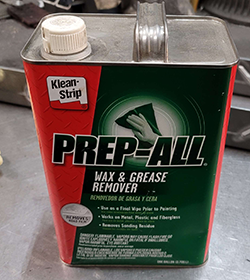
You should be able to find some degreaser like this at a local hardware store...
Wiping down and cleaning the rest of the undercoating that will come off with degreaser...
Step 3:
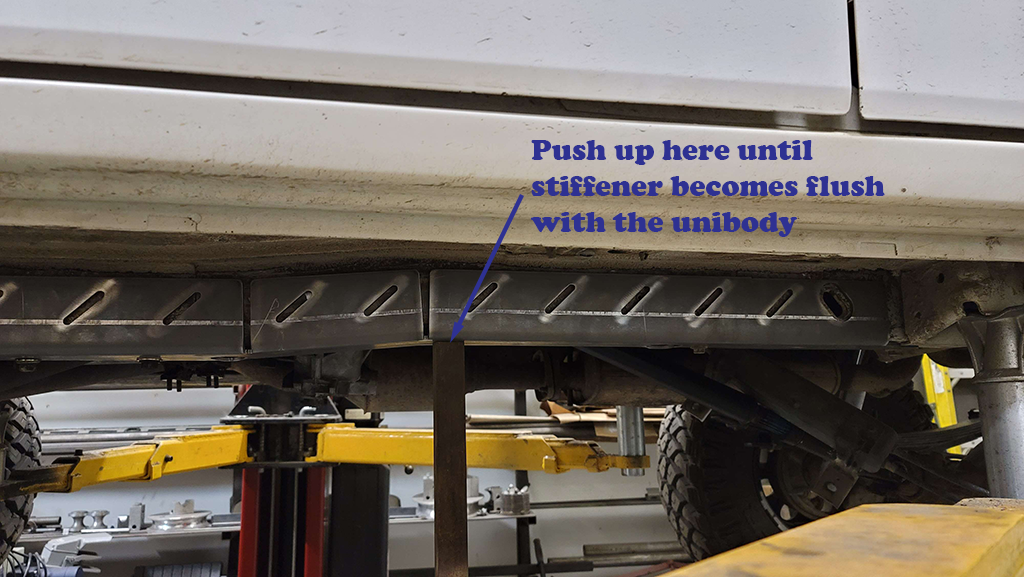
Now it's time to get the stiffeners up and onto the unibody. You can use the transmission crossmember bolts (you may need to add a washer) to hold them up in the front. The rear will require you to use a jack and a piece of wood (or something similar) to push the stiffeners up to the unibody. There are slots in the sides of the stiffeners where they will need to bend.
**Be EXTRA careful doing this!! DO NOT push up with enough force to upset the vehicle on the lift or however you have it supported!!! Make 100% sure that the vehicle is stable before getting under it!
Push up just behind the second slot until the stiffener gets tight to the unibody:
Once the stiffeners are in place, use a sharpie or some other marking device to mark where all of the angled weld openings are, the slots, and the front and rear of the stiffeners are. These are the places you will end up welding to. Also, mark the inside edges of the stiffener.
Now that you have all the places marked where you will weld, remove the stiffeners, and grab your favorite grinding/sanding tool. You want to remove the remaining paint in all the weld locations, down to bare metal. The metal here is pretty thin, so be careful to just remove the paint and not grind into the metal and make it any thinner than it already is! You will need to remove the paint about 1/4" beyond the weld area so that it won't melt and off-gas into your welds and make them porous. Also at this point run your hand along the sides and bottom of the unibody and if there are any high spots you need to either hammer them flush or grind them down (the factory spot welds frequently end up with a little high spot).
Here is our preferred type of air tool for this part of the job - 1/4" right angle die grinder with a rubber pad and a sanding disc:

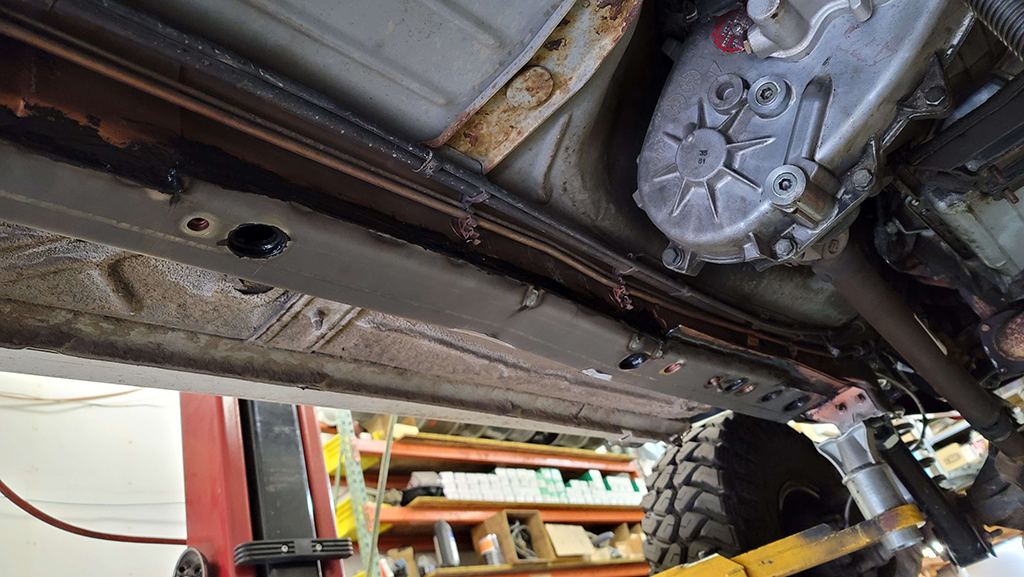
Using the above tool, we sand all the areas that we will weld to down to bare metal. We end up with the Jeep looking like this:
Step 4:
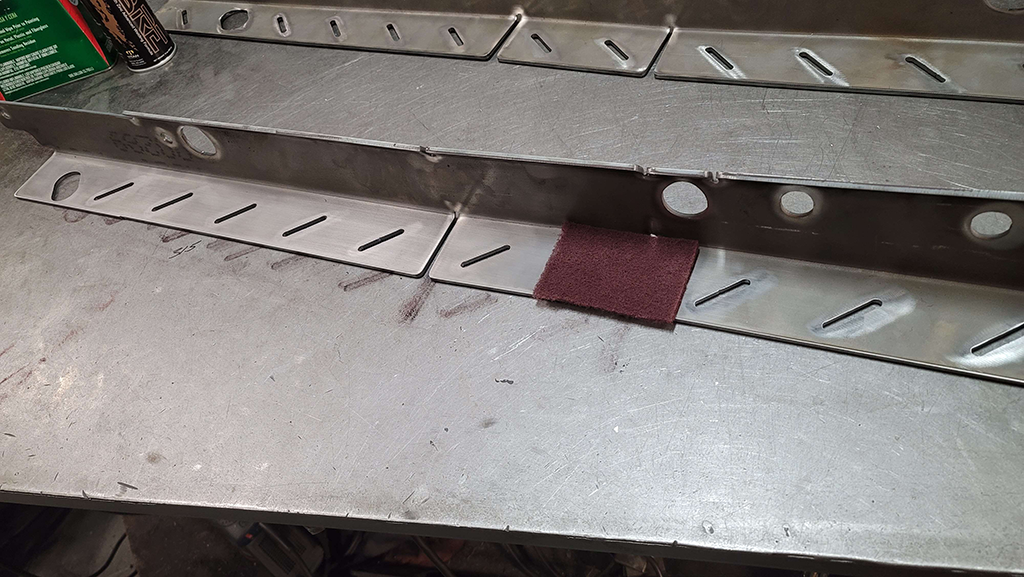
Now take the stiffeners and prepare the inside of them for weld-thru protectant. We use red scotch-brite pads and scratch the insides up until the metal is fully dulled. If there are any shiny spots left, the protectant won't stick and seal as well.
Grab yourself a couple rags and the degreaser again, and thoroughly wipe down/clean the insides of the stiffeners, and all over the unibody where the stiffeners will go. Give the degreaser at least a few minutes to fully evaporate.

Next, grab your weld-through protectant or weld-through primer of choice. We have tried out lots of different brands, and have settled on one particular brand that seems to work the best. It is Cobre Corrosion Protectant, and has Zinc for the best protection, along with copper for better welding. You can find this for sale on our site - Click Here

Spray two medium coats (the first coat will usually be just a tiny bit see through) on the inside of the stiffeners and all over your unibody where the stiffeners will be installed. One can is just about perfect for the job. Letting the Cobre dry for about an hour will yield the best welding experience. Here is what it should look like now...

Step 5:
Once you've got all the prep work done and the protectant or primer is dry, you are finally ready to start welding! Get the stiffeners bolted up to the unibody using the trans mount fasteners. Using a combination of pushing upwards with your jack and some large c-clamps, make sure the front of the stiffeners are tight to the unibody. Begin by a couple short (3/4" or so) welds at the very front, underside, and inside of the stiffeners and then start moving rearward, pushing the stiffeners up and inwards as you go to keep them as tight to the unibody as you can.
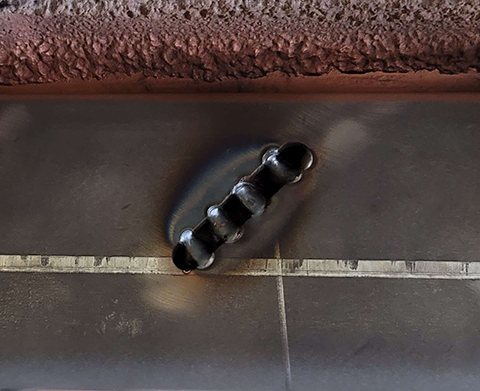
For the angled weld openings, we recommend simply welding 4 "spots" in each one. Start with the welding wire on the unibody first, then move to one side of the weld opening. Then let it cool for a second before doing the same to the other side of the opening - start with the welding wire in the middle and drag the puddle out to the other side. This way, you won't overheat the unibody sheetmetal and will have lots of smaller plug-like welds. See the following picture:
Once you get them all welded up, it will look like this:
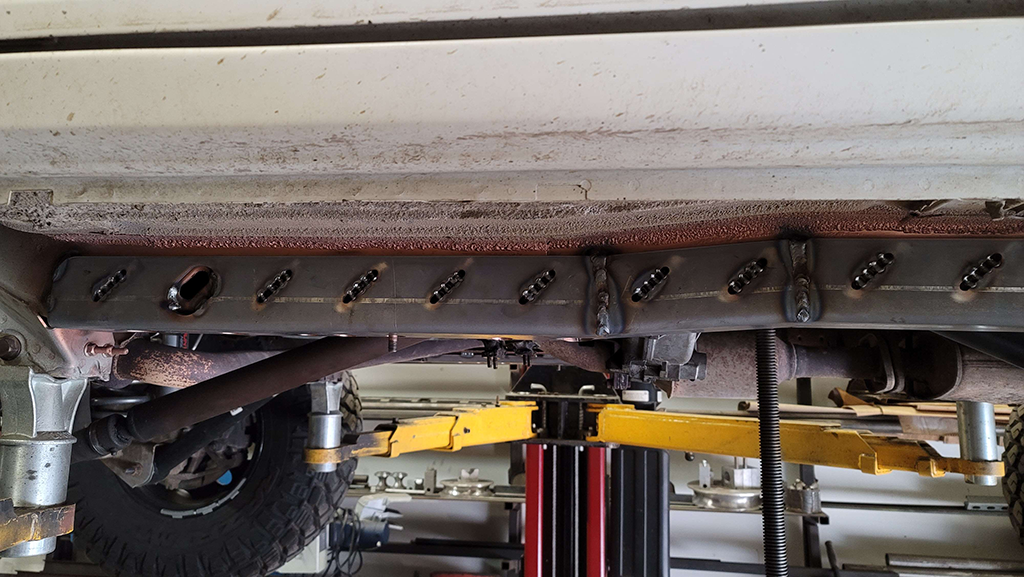
Make sure to fully weld up the slots where the bends are located. The most important part in those areas is to connect the stiffener material together for strength. Try not to super-heat the unibody there so you don't get a stress crack forming under the stiffener later on.
On the inside, weld in short lengths all along the stiffener. Do not make any long welds or you will open up the possibility for a crack at the weld. See the picture below:
Step 6:
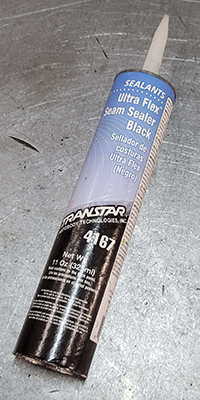
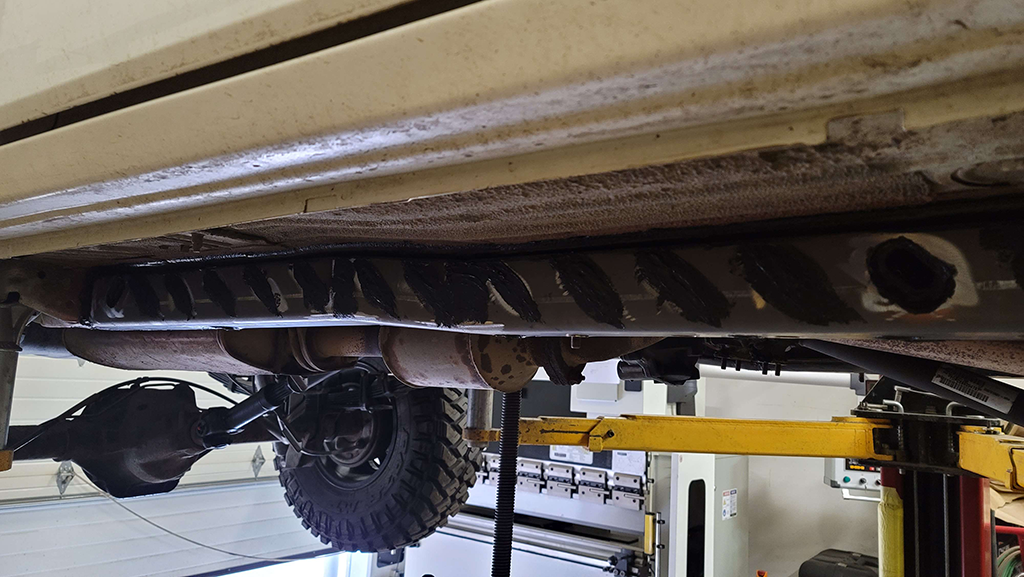
Now that the stiffeners are welded onto the vehicle, it's time to finish the job. We like to use the following autobody seam sealer (Transtar #4167) but you can use whatever good quality paintable seam sealer you want. Just make sure to get an automotive autobody type seam sealer so that it lasts and stays sealed in the harsh environment your vehicle will see.
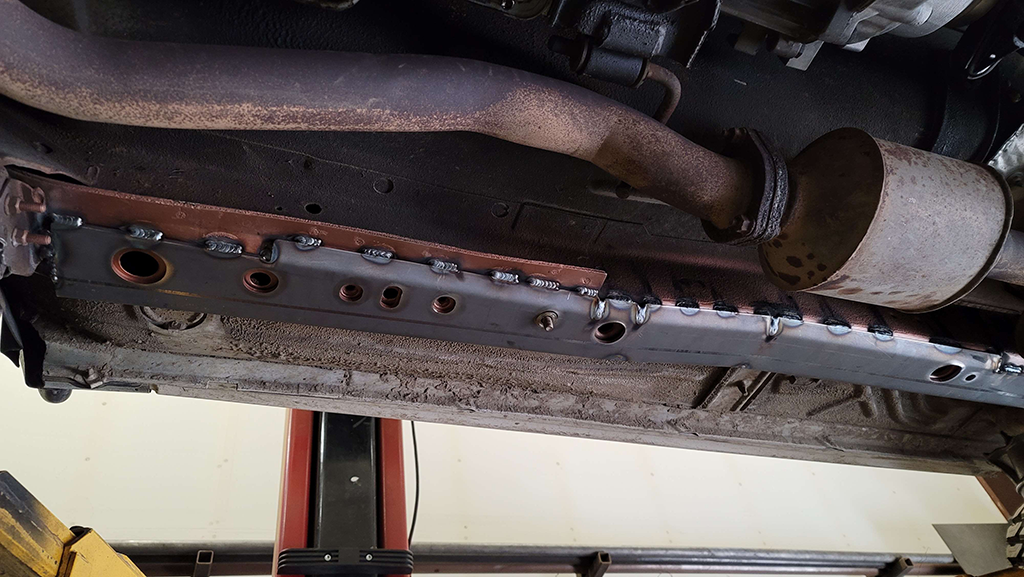
Carefully seal ALL outside edges and weld openings with the seam sealer. Pay close attention to the front lower outside corner as that will be your largest gap to fill. Use a flashlight to look around all the sealer and make sure you don't have any little bubble openings. The more time you spend on this step, the better chances will be that you won't have rust forming between the stiffeners and the unibody. There are holes in the bottom of the stiffeners where the factory frame holes are - try to get some sealer there as well between the unibody and the stiffeners. You want to make it as impossible as you can for water to get between the stiffener and the unibody.
Let the seam sealer fully dry - we usually give it overnight if not longer before moving on.
Step 7:
Finishing up! Now's the time where you can finish the outside however you'd like. We have done body filler work on some vehicles to completely hide the welds, but most of the time we simply trim off excess seam sealer, and then coat the area with undercoating or bedliner. Recently, we have had very good luck with DupliColor Truck Bed Coating in a can (part number #TR-250). This particular part number works well - it takes a couple days to fully cure, but seems to offer some pretty decent protection from a spray can.
Here's the finished product: